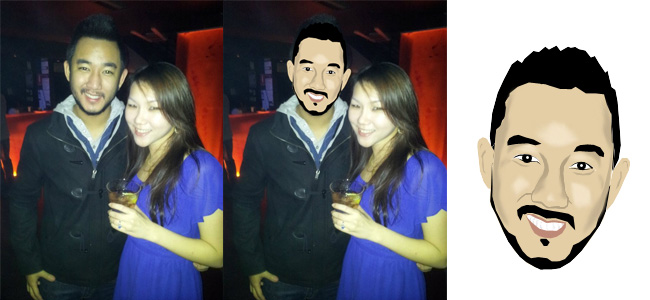
In this simple tutorial, I’m going to show you how to transform any regular photo into a vector image of your liking. Take the above image for example, I have transformed my head into a vector image which I use as an avatar in many different forums and message boards.
I will be using Adobe Photoshop CS3 for this tutorial, but the concepts are very basic and different illustrative platforms can be used to achieve this effect.
Step One
Select the photograph of your choice. Open it up in photoshop. The larger the resolution of your image, the easier it is to detail the end product.
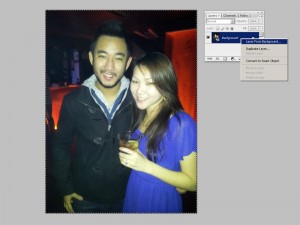
Create a new layer by right-clicking the background layer and selecting Layer from Background. Once new layer is created, rename the layer Photograph and delete the existing background image.
Step Two
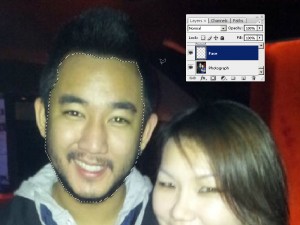
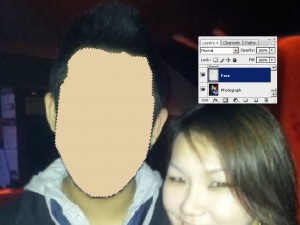
Create a new layer called Face. Using the Polygonal Lasso Tool, carefully outline the edges of your face.
Using the Paint Bucket Tool, select a color that closely resembles your skin tone as the foreground color and fill the selected space.
Step Three
You can disable the visibility of a layer by clicking on the “eye” icon on the left of the layer. Disable the visibility of the Face layer.
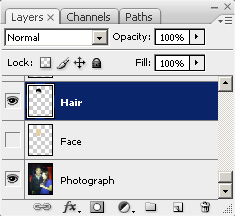
Now with the Face layer disabled, you are able to vectorize the next layer according to the original image.
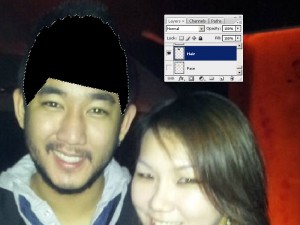
Create a new layer called Hair. Using the Polygonal Lasso Tool again, carefully outline the edges of your hair.
Again using the Paint Bucket Tool, fill in the selected area with a color that closely resembles the color of your hair.
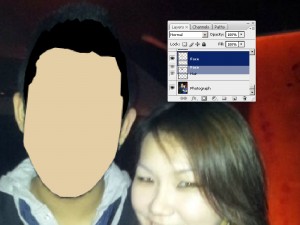
As you can see, the bottom section of the hairline is overfilled. Because we have already created a Face layer, we will move the Face layer above the Hair layer to overlap the two vectors accordingly.
Step Four
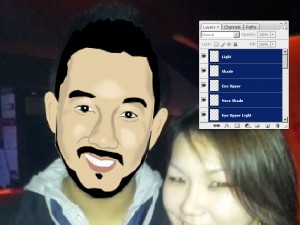
Repeat the same process with the rest of the photo that you would like to vectorise. Create smaller vectors for indents in the facial structure and color them accordingly. I find that going vertically down the Y-Axis of the color picker achieves better shaded quality than moving the color picker across the entire map to find a suitable color.
Below is a step-by-step image guide of the layers I used for the vector above.
Step Five
You’re vector will start to look fuller after adding multiple layers. Once you are completely satisfied with the amount of layers and detail in the vectors, it is time to move onto Light & Shade.
The same concept applies to the light and shade. Using the Polygonal Lasso Tool, select the shaded region and fill in the darker tone – and vice versa for the light.
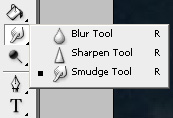
The major difference is that instead of stopping after filling in your solid tone, you continue adding detail by smudging the shades of color using the Smudge Tool.
Choose your brush size accordingly. Make sure its not too big so its doesn’t look sparse, and make sure it isn’t too small or you’ll end up spending hours smudging it out.
I’ve set the smudge strength to 20%. You should be able to find these options in the tool bar above the image.
Make sure you smudge the selection outwards to create a dissolving effect. Also make sure the appropriate layer is selected before you smudge.
Step 6
You’re vector is almost complete! At this stage, make sure you save your artwork in *.psd format so you are able to tweak it in the future.
After saving the image, we will now attempt to flatten all the layers of the image.
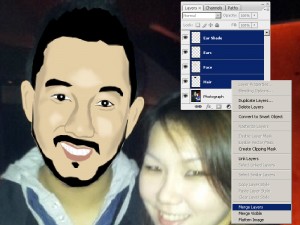
First selecting the top most layer (in this case called Light), hold shift and scroll down the layers until you hit the layer just above the Photograph layer.
Right-click on the selected laters and click on Merge Layers.
All the vectorised layers will merge into one main layer. You can now move the entire vector image as a whole using the Move Tool.
Step 7
Disable the visibility of the background (Photograph) layer and crop the vector image to the size of your liking.
Congratulations! You have created your vector image!

If you have any questions or would like further assistance, just leave a comment in the comment section below and I’ll get back to you as soon as I can!




Tish
Jun 27, 2011 -
I cant believe you did a whole tutorial. HAHAHA, but gj! :)
Adam
Jun 27, 2011 -
hahaha i know, i can’t believe it too! :) thx